Showing posts with label Cook Book Challenge 2011. Show all posts

18 May 2011

Cook Book Challenge : Hush Puppies


Theme 8 : Crunchy
Cook Book : Jamie Oliver.  Jamie's America
Recipe : Hush Puppies


I love this cook book.  I've made a few things from it already.  I was keen on making hush puppies because I've heard of it many times but didn't actually know what it was or what it tasted like.

It's very crunchy and it's moorish.  It's quite easy and takes no time to make. This would go really well with a nice cold beer.  We had it as a side for dinner.  Even though there is beer in the batter, it's not too strong in it.  It's perfect for children as all children love crunchy finger food.

recipe: (makes 25-30)
300g fine cornmeal or polenta
100g self-raising flour
300ml bottle of beer
100g of sweetcorn (I used frozen)
4 spring onions, sliced finely
120g grated cheese
salt and pepper
vegetable oil for deep frying

1.  Put the cornmeal and flour into a bowl, add your beer and leave to sit for a few minutes.  Add the corn, spring onions, cheese and pinch of salt and pepper.
2.  Using a fork, mix well.
3.  Heat the oil in a large pot or pan on a high heat until it reaches 180degC
4.  Using a tablespoon, carefully drop spoonfuls of the batter mixture into the oil.
5.  Let them fry for about 3-4 minutes, then remove with a slotted spoon, and drain on kitchen paper towel.
6.  Serve with a sprinkling of a little sea salt.  Best eaten while hot.


You can check out previous posts on my 2011 cook book challenge here.

Bon Appetite,
Cherrie

30 April 2011

Cook Book Challenge : Egg Pin Wheels for an Afternoon Tea Dinner


Theme 7 : Eggs
CookBook : The Dairy Book of Home Cookery by Sonia Allison 
for the Milk Marketing Board of England and Wales
Recipe : Pin Wheel Sandwiches


With my Hubby and his family originally from England, we were all excited for the Royal Wedding of Prince William and Kate Middleton.  My mother in law came over for dinner but instead of eating dinner I prepared an afternoon tea affair.  The cookbook I used actually belong to Hubby's Nan in England.  She let me keep it during our holiday there a few years back.  This version was published in 1978 and as you can see it's been well used.  To this day, my mother in law still cooks dishes that she got from it.

Pin wheel sandwiches shows up regularly in afternoon teas, alongside other fabulous finger foods, sweet and savoury.  It can be filled with any filling you like.  I chose Egg.  


Tea is, of course, compulsory though coffee can also make an appearance.  I even took out our special Harrods tea towel just for the occasion.


Other dishes I also prepared for the Afternoon Tea Dinner :

My Afternoon tea table

Salmon sandwiches and cheese and cucumber sandwiches

Victoria Sponge Cake

After dinner, Hubby made Pimm's Deuce.  


Recipe :
4 hard boiled eggs, peeled and chopped
2 tbs mayonnaise or salad cream
1/2 tsp English mustard powder
salt and pepper
6 white or brown bread slices, crusts removed
butter
alfa alfa

1.  In a bowl, place the eggs, mayonnaise or salad cream, English mustard powder salt and pepper.  Set aside
2.  Using a rolling pin, roll over a slice of bread to flatten.
3.  Spread with butter and 1 - 2 tablespoons of the egg mixture.
4. Sprinkle alfa alfa over the egg mixture.
5.  Roll tightly to enclose the filling.  Place on place, seam side down.
6.  Repeat with the remaining of the egg mixture.
7.  Refrigerate for 30-60 minutes to firm up a little
8.  Cut into 3 or 4 even slices.  (as you can see, I didn't cut them evenly hehe)


 Check out my previous posts on this year's cookbook challenge.

Bon Appetite,
Cherrie

13 April 2011

Cook Book Challenge : Chocolate Meringue Roll


Theme 6 : Celebration
Cookbook : Australian Women's Weekly.  Cook
Recipe : Meringue roll


I love this cookbook.  It has nearly everything in it and I want to cook nearly everything in it.  It's my "go to" book when I can't find a recipe in my other cook books.

For the Celebration theme, I wanted to make something for my sister in law's birthday.  She was having a little family gathering and since she had just given birth to my beautiful nephew a couple weeks ago, family were bringing dishes to contribute to the party.

I decided to make a Chocolate meringue roll.  I changed the recipe a little because I wanted to include the last of my kalamansi that I harvested from my tree.


The recipe was just plain vanilla meringue but I added cocoa powder and sprinkled flaked almonds to add a crunch so the dessert is not all one texture. The filling was vanilla cream and kalamansi curd. I used the left over curd to fill my Easter chocolate creme egg cupcakes.  I have made the kalamansi curd so many times and I prefer it to lemon.  It has a little sweetness to it that the kalamansi has though the curd is still quite tart.


4 egg whites
1/2 cup caster sugar
2 tbs cocoa powder
2 tbs of extra caster sugar
1/2 cup thickened cream, whipped
50g flaked almonds
kalamansi curd.  (you can get the recipe here)

1.  Preheat the oven to 200degC (180degC fanforced).  Grease and line a swiss roll pan (26cm x 323cm)
2.  Beat the egg whites until soft peaks form.  Add the sugar, one tablespoon at a time, beating until the sugar dissolves between each addition. Sift the cocoa powder into the egg whites and gently fold in.
3.  Spread the mixture into the baking pan, and sprinkle the flaked almonds evenly.
4.  Bake for about 10-12 minutes or until browned lightly.
5.  Turn meringue onto baking paper, that has been sprinkled with the extra caster sugar.  Gently peel away the lining paper and let stand for 2 minutes.
6.  Spread the whipped cream onto the cake leaving about 2-3cm along the edge.  Spread the kalamansi curd on top.
7.  Using the baking paper as support, roll the meringue firmly from the long side.  Transfer carefully onto serving dish.
8.  Refrigerate at least 30 minutes before serving.


You can see my previous posts for this years CookBook Challenge here.

Bon Appetite,
Cherrie

4 April 2011

Cookbook Challenge : Chocolate Chunk Brownies


Theme 5 : American
Cookbook :  The Good Taste Collection : Chocolate
Recipe : White and Dark Chocolate Chunk Brownies


There were so many options for this fortnight's theme.  American's are known for their fast food, their burgers and hotdogs, and their brownies.  As you can see, I chose to make the latter.  I love brownies and I've made many different versions from many different recipes.

This time I chose to make the one from this book.  Simply because I've never made this one before.  I like this recipe.  The brownie turned out fudgey and gooey.  Though the recipe calls for white chocolate chunks only, I added dark ones as well.  Only because I love dark chocolate.


Makes 24
200g dark cooking chocolate, roughly chopped
200g butter, cubed
3 eggs, lightly whisked
1 tsp vanilla paste
115g plain flour
30g cocoa powder
220g caster sugar
125g white chocolate, broken into chunks
125g dark chocolate, broken into chunks

1.  Preheat oven to 170degC (150degC fanforced).  Line the base of a 20cm square baking pan with baking paper, allow to overhang the sides.
2.  Place the dark cooking chocolate and butter in a heatproof bowl over a saucepan of simmering water   and stir occasionally until the mixture is smooth.  Remove and set aside to cool slightly.
3.  Add the eggs and vanilla paste and whisk to combine.
4.  In a bowl, sift the flour and cocoa.  Then add the sugar and melted chocolate mixture.  Stir to combine.  Add the white and dark chocolate chunks.
5.  Pour the mixture into the baking pan and bake for 45 minutes or until crumbs cling to the skewer inserted in the middle of the brownie.  Cool completely in the pan.

Note:  If you can resist jumping into it straight away, it's much easier to cut if you set aside overnight and cut the next day.


Check out other posts in my cookbook challenge 2011

26 March 2011

Cookbook Challenge : Rosemary and Garlic Focaccia


Theme 4: Outdoors
Cookbook : The big book of bread
Recipe : Rosemary and Garlic Focaccia


I'm a little behind in the posting of my cookbook challenges.  However late, I am still excited and feel inspired to keep going.

For this fortnight's outdoors theme, I chose bread.  Bread is so versatile.  It can filled with delicious meats and salads or can be left plain.  It is portable and can be taken anywhere.

This recipe was made in a bread machine but I'll also give the manual method.  Baking bread in Melbourne can be hit and miss because of the unpredictable weather, so it's handy having a bread machine.  Having said that though, it is also thoroughly satisfying kneading the dough by hand and giving it all the attention it needs. 

I topped my focaccia with garlic and rosemary but any combination can be used.

400g strong bread flour
1 tsp salt
2 tsp dried yeast
3 tbs olive oil, plus extra for drizzling
200ml of tepid water
2 stalks of rosemary, leaves taken off the stem
4 garlic cloves, thinly sliced

1.  For machine bread: place all the ingredients into the baking bucket according to manual instructions.  (note:  The order of adding ingredients is important because it keeps the yeast away from the liquid ingredients until it's time to knead them together).  Then set the machine to the dough setting.  (mine takes about 1 1/2 hours)

To make manually:  Sift the flour and salt into a large bowl, then stir in the yeast.  Make a well in the center, then add 3 tablespoons of olive oil and water, mixing to form a soft dough. (don't add all the water at once, add 3/4 of it then add more if needed).  Turn the dough onto a lightly floured surface and knead until smooth and elastic (about 10-15 minutes).   Shape the dough into a ball, then place in a lightly oiled bowl, cover and leave to rise in a warm place until doubled in size.

2.  Once the dough has risen either from the machine or manually, knock back the dough on a lightly floured surface and roll out into a rough rectangle about 2-3 cm thick.  Transfer the dough onto a greased baking tray.  Using your finger tips, make little dents into the dough.  Leave to rise again for 30 to 45 minutes till it slightly rises.

3.  Preheat oven to 200degC (180degC fan-forced).  Drizzle olive oil over the dough and sprinkle with the rosemary and garlic, spreading it out evenly.

Bake for 20 to 25 minutes or until the focaccia has risen and turned golden brown.


Please check out my previous posts on this year's Cook Book Challenge

Bon Appetite,
Cherrie

3 March 2011

Cook Book Challenge : Raspberry Delight


Theme 3: Love
Cookbook : Little Kitchen by Sabrina Parrini
Recipe : Raspberry Delight


Love.  This theme can be interpreted in many ways.  The way I interpret this week's theme is Deanna.  Yes, I love her but the reason I chose her for this theme is that she loves to cook and bake.  She recently turned down an invitation to attend a previous blogger lunch, simply because there will be no cooking involved, unlike the last one she attended.  You have seen many posts on her and her kitchen creations and I am certain you will see many more in the future.


Having children in the kitchen can be a bit messy but they always have fun.  So if you don't worry about what needs to be cleaned up afterwards, children can get be quite helpful


Since this recipe came from a children's book, it's very easy and really only requires a few ingredients.

300ml cream
1 tsp vanilla bean paste
2 punnets raspberries (we used frozen mixed berries)
2 tsp caster sugar

1.  Put the cream and vanilla bean paste into the bowl of an electric mixer.  Beat till soft peaks form
2.  Tip half of the berries into a small bowl and mash them with the sugar using a fork until it forms a runny sauce
3.  Arrange a layer of cream in a glass then spoon a layer of the berry sauce then the whole berries.  Repeat till you have about 2-3 layers of each or until you reach the top.

We also add crushed up biscuits (scotch finger) to the top and Hubby and I drizzled some butterscotch sauce on it as well.

Deanna layered her own glass (with a little help from me) and I did the other.  She also made another two smaller ones but they didn't photographed well (read : messy) but all 4 glasses were very delicious no matter what they looked like.


Check out my previous posts on this year's Cook Book Challenge


Bon Appetite,
Cherrie

8 February 2011

Cook Book Challenge : Bibimbap


Theme 3: Rice/Noodles
Cookbook : Jill Dupleix - Lighten up
Recipe : Korean Bibimbap


I was looking forward to this fortnight's theme.  I actually haven't had Korean Bibimbap before but Hubby had it once and really liked it and asked me to cook it.    I found the recipe in Jill Dupleix's book.  I have to admit I don't know much about Korean food so I also did a little bit of research and found a good recipe by Kitchen wench.  So below is a recipe by Jill with a little inspiration from Kitchen Wench' version.


250g beef mince
4 tbs soy sauce
1 1/2 tbs sesame oil
salt and pepper
100g baby spinach, washed
1 carrot, peeled and cut into matchsticks
1 small zucchini, cut into matchstick
1 medium onions, sliced
100g bean sprouts
sesame oil
fish sauce
hot cooked rice
4 eggs

1.  Marinate the beef mince in the soy sauce and sesame oil for 1 hour.
2.  Saute the carrots in a little bit of oil.  Add a small splash of fish sauce and sesame oil.  Remove and set aside in a bowl.
3. Saute the baby spinach, onions, zucchini and bean sprouts, the same as the carrots.
4.  Cook the mince, including the marinade, until well done.
5.  Fry the eggs, sunny side up.
6.  Divide the rice in 4 bowls and add the the meat and vegetables on top.  Place the fried egg on top.
7.  Serve with thick chilli sauce or Korean Gochujang.


Check out my previous posts on this year's CookBook Challenge

27 January 2011

Cook Book Challenge : Chicken with Curry-Lime Butter


Theme 2 : Citrus
Cookbook : Tyler FLorence - Tyler's Ultimate
Recipe : Ultimate Chicken with curry-lime butter.


Group avatar


I love chicken accompanied with any citrus.  This one doesn't disappoint.  This is the first time I've had lime with chicken but I'm glad I tried it.  The curry-lime butter is just subtle enough that you can still taste the chicken but it gives the chicken a lift in flavour.  You can use any chicken pieces you like.  The recipe calls for chicken wings but I used wingettes and drumettes.  With any curry butter you don't use, you can freeze and use for another time.


Preheat the oven to 200degC.  Drizzle the chicken pieces with olive oil then season with salt and pepper and toss to coat.  Spread out onto a baking tray and roast for 30-40 minutes or until the skin gets crisp and brown the meat is cooked through.


To make the curry-lime butter, add 125g soften butter, 2 tsp Thai red curry paste, zest and juice of 1 lime, 1 tbs honey and a splash of soy sauce (I didn't have Thai red curry paste, I used 1 tsp of Madras curry paste instead) .  Season with salt and blend to mix.  Place in a large bowl


When the chicken is cooked, place in the bowl with the butter and toss till all the chicken is coated.


If you would like to join the cookbook challenge, pleas visit the forum here.

Bon Appetite,
Cherrie


8 January 2011

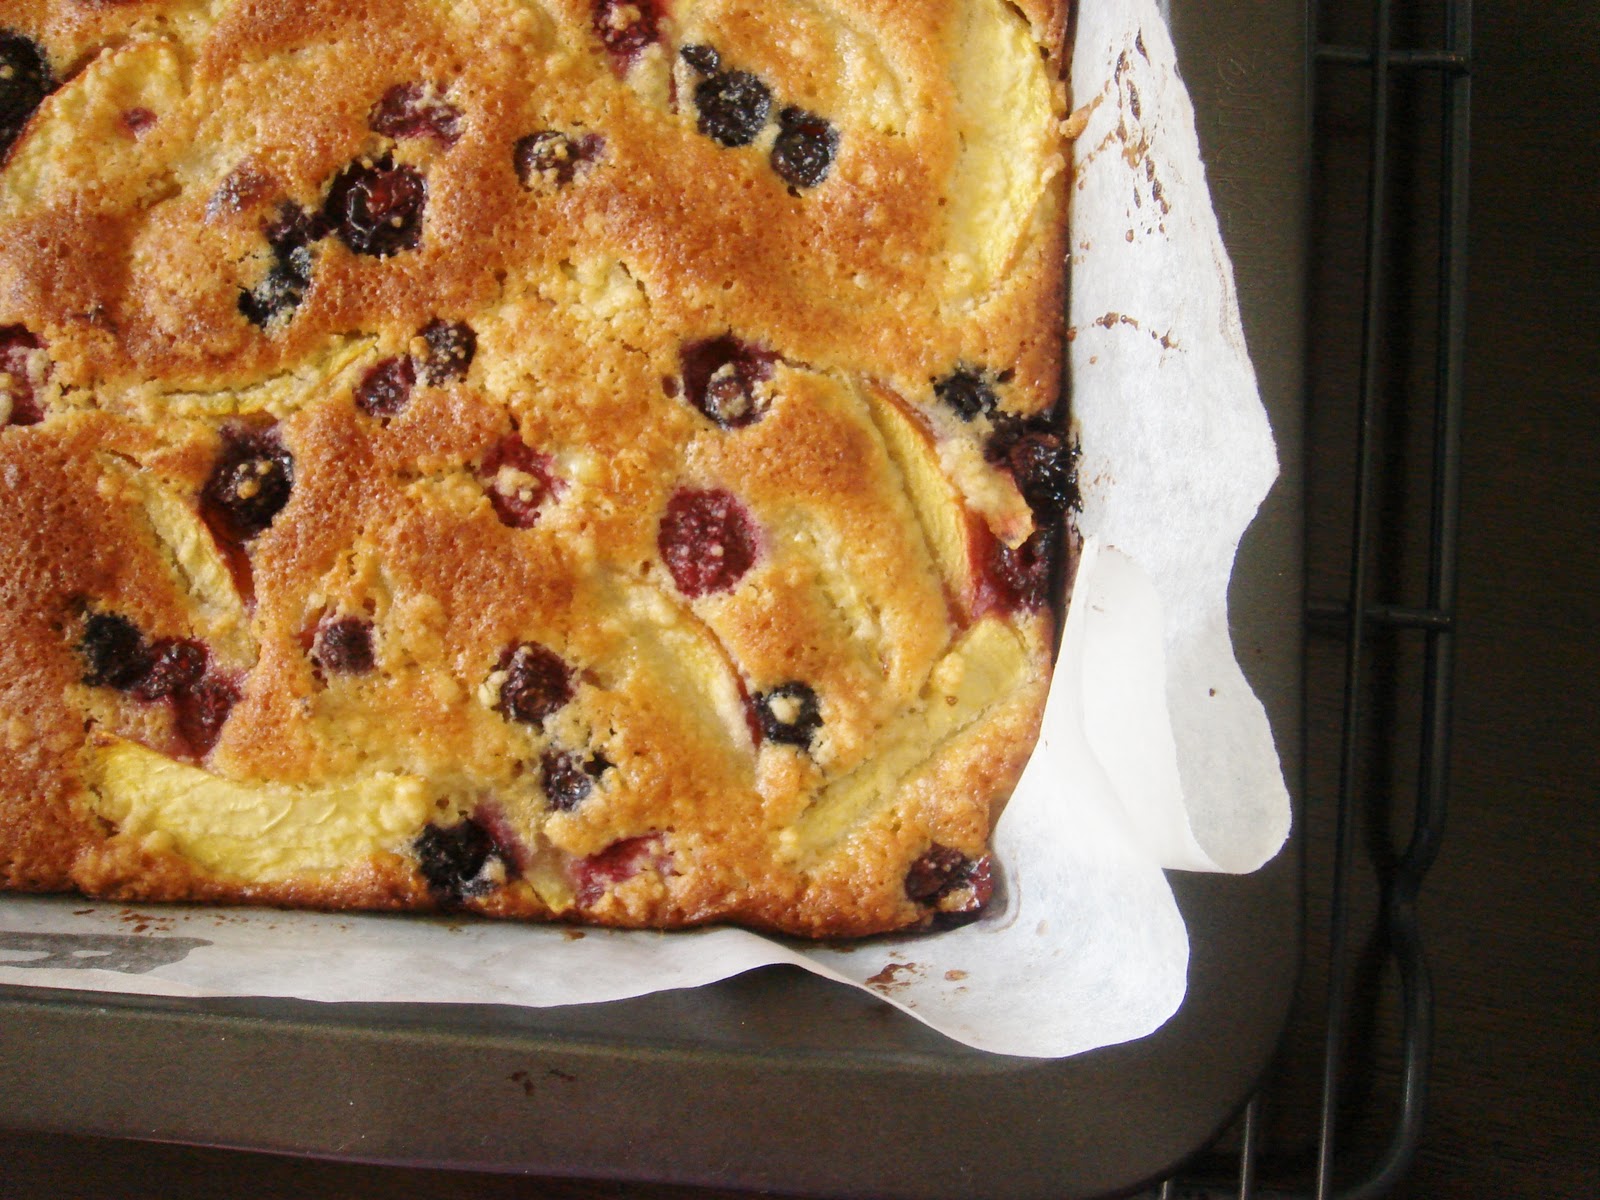
Cook Book Challenge : Peach and Mixed Berry Slice


Theme : Stonefruit
Cookbook : Bill Granger - Every Day
Recipe : Peach and Mixed Berry Slice


So... Here I am again.  Another cookbook challenge but this time, I'm determined to see this challenge all the way through.  After much discussion on twitter and at our cookbook finale lunch, it was decided to change it from weekly to fortnightly themes.  This will make it easier for all participants to keep up.  Talking from experience, if you fall behind, even a week, it's very hard to catch up.


I have decided to use Peaches for this fortnight's theme of stone fruit.  It is one of my favourite fruits.  Even though I don't usually cook fruit, as I like to eat them fresh, I decided to make a slice that also includes berries.  I used frozen berries but by all means use fresh ones. 

I loved this.  It's sweet and tart, chewy and crunchy.  It was a hit with the family.  It is something I would make again.


185g Plain flour
1 1/2 tsp baking powder and 1/2 tsp extra
125g chilled and diced butter
115g soft brown sugar
115g caster sugar
3 ripe peaches
90g frozen berries
2 tsp vanilla extract
1 egg, lightly beaten
185ml milk

1.  Preheat the oven to 160degC fanforced and grease and line the base of a baking tray 20 x 30cm.
2.  Peel the peaches by scoring a cross in the skin with a sharp knife, then blanch for 30 seconds in boiling water. Refresh in cold water and peel the skin away from the cross.  Slice into wedges.
3. In a large bowl, sift the flour and baking powder then rub in the butter with your fingertips.  Stir in both sugars.
4.  Press half of the mixture over the base of the tray.  Lay the peaches over the top and sprinkle with the berries.
5.  In a small bowl, combine the egg, milk and vanilla extract.  Add the extra baking powder tot he rest of the base mixture.  Add your wet ingredients and mix.  Don't worry if it's lumpy
6.  Pour evenly over the top of the fruit and bake for 45-50 minutes.  Cool in the tray then cut into squares when ready to serve.


If you would like to join, please register here.

Related Posts with Thumbnails